Feel the Vibes with Oraimo Products


From the very beginning, we wanted to do SOMETHING DIFFERENT, something that can change people’s life so that they can explore the wonderful world.

To change the world, we decided to start with SMART accessories, and to KEEP EXPLORING.

All your requests, concerns, complaints, suggestions and ideas are welcomed.

Call/Whatsapp: +2348061379390


Top Mobile Phone Problems and Solutions
For better or worse, we are all glued to our smartphones. A phone that’s not working correctly can be a major inconvenience, especially if you need it for work or school. Read on for solutions to four of the most common smartphone problems.

Your Phone’s Slower Than 90’s Internet

If your phone has gotten slower over time, chances are that it’s bogged down with apps and files. To solve this problem, start by taking a look at your files and deleting things you don’t need. Consider moving media files like photos to an external hard drive or a cloud service. If you have apps, you aren’t using anymore uninstall them.

Next, check to see which apps are running in the background. Anything that sends you push notifications is suspect. Do you really need twenty news updates a day? If not, go into the app’s settings and turn off push alerts.

Your Battery Dies Before Noon

Short battery life is one of the most common cell phone problems. Batteries do wear out over time, and if your phone is more than two years old, you should consider getting it replaced. If your phone is newer or you aren’t ready to take that step yet, there are some things you can try first.

Many smartphones will tell you which apps are sucking the life out of your battery. Go to settings and find the “battery” section. This will be labeled slightly differently depending on your device. Once you’ve found it, look to see which apps are using the most battery. If you see apps listed that you haven’t used recently, it means they are running in the background. Again, push notifications are a common culprit, so consider navigating to those apps and turning push alerts off.

If you don’t see any obvious problems with apps, you can try changing some other settings. Turning your “location” function off and lowering your screen’s brightness can help save power. You can also shorten your phone’s screen timeout setting so it will fall asleep sooner when not in use. If none of these changes help, it’s probably time to take your device to a phone repair shop and get a new battery.

Your Screen Keeps Freezing

This is another problem that is usually caused by an overloaded device. Start by clearing your phone’s cache and getting rid of unneeded files and apps. If your phone’s storage space is still almost full after doing that, move some things to outside storage, like your PC or a cloud service. Screen freezing is sometimes caused by a malware infection, so after taking the steps above install an antivirus program and run a scan.

Your Whole Phone Shuts Off or Freezes

You’re in the middle of checking your email, and your phone goes black and won’t wake up. Don’t panic! You should be able to restart it. On most devices holding the power button and the home button down at the same time for several seconds will force a restart on a crashed or frozen phone. If that doesn’t work, it means something serious has gone wrong, and you’ll need to get the professionals involved. If the phone restarts, you may be able to fix the problem yourself.

Crashing phones can be caused by several things. Start by checking to see if your phone is overloaded with apps and files ( yes there is a reoccuring theme here). After you’ve removed stuff you don’t need and cleared your cache, run a virus scan. Ideally, you will do this with an app that can both find and remove viruses.

If your phone is squeaky clean, then software might be to blame. It’s pretty common for operating system updates to cause problems, so if you’ve recently updated something, you might need to reset the phone to factory settings. If you have tried all the above steps and your phone is still crashing, don’t hesitate to take it into a repair shop.

Mobile Cell Phone Earpiece / Ear Speaker Problem and Solution

Learn to Solve / Fix if Speaker of Android Smartphone or iPhone is Not Working During Call.

This chapter explains Mobile Phone Earpiece or Speaker Problem and Solution – How to Solve Earpiece or Speaker Fault in any Mobile Cell Phone. These problem and solution apply to all brands and make of mobile phones including Nokia, Samsung, iPhone, China Mobile Phones, Motorola, HTC, Sony, Blackberry, Alcatel, Apple, AudioVox, Benefone, Danger, FIC, Hagenuk, Palm, Kyocera, LG, Panasonic, Huawei, ZTE, Spice, Lava, Sony Ericsson, Micromax etc.

What is Earpiece or Speaker in a Mobile Cell Phone?


Earpiece or Speaker in a mobile cell phone is an electronic component or part that helps to listen to sound during phone call. It is also called Speaker or Ear Speaker. Earpiece is controlled by Audio IC or Power IC (UEM).

Types of Faults or Mobile Phone Earpiece Problem Problems

  • No sound during phone call.
  • Less sound during phone call.
  • Sound with interruption.

How to Solve and Fix Earpiece or Speaker Fault in Android Smartphone and iPhone

  1. Check Speaker Volume during Phone Call.If speaker volume is OK the Check Earpiece / Speaker using a Multimeter.
  2. Keep the Multimeter in Buzzer Mode. Value must be 25~35 Ohms. If the Value is NOT between 25~35 Ohms then change the Earpiece / Speaker.
  3. If the problem is not solved then Check Circuit Track of Earpiece Section. Do Jumper Wherever required.
  4. If the problem is not solved then Heat, Reball or Change the UEM / Audio IC.
  5. If the problem is still not solved then Heat, Reball or Change the CPU.

Note:

  • If there is less sound or sound is not clear during phone call then change the speaker.

Mobile Phone Ringer / Loud Speaker Problem and Solution
Mobile Phone Ringer Problem and Solution – How to Fix Loud Speaker Not Working

Here we will learn different Mobile Phone Ringer Problem and Solution – How to Solve Ringer / Loud Speaker Not Working Fault in any Mobile Cell Phone or Smartphone. These problem and solution apply to fix No Sound from Ringer / Loud Speaker of all brands and make of mobile phones including Nokia, Samsung, iPhone, China Mobile Phones, Motorola, HTC, Sony, Blackberry, Alcatel, Apple, AudioVox, Benefone, Danger, FIC, Hagenuk, Palm, Kyocera, LG, Panasonic, Huawei, ZTE, Spice, Lava, Sony Ericsson, Micromax etc.

What is Ringer in a Mobile Cell Phone?

Ringer is a type of card level part of a mobile phone or smartphone that rings or plays loud sound. It is also called by several other names like – I.H.F Speaker, Buzzer, Loud Speaker, and Melody etc.

Types of Faults or Problems in Mobile Phone Ringer

There can be several types of faults or problems in the ringer of a mobile cell phone:

  • Ringer / Loud Speaker not working
  • Less sound from the Ringer
  • Sound coming from Ringer but with interruption
  • Sound not clear
  • Cannot Play Music or No Sound from Video
  • Android Phone Not Ringing
  • Android Smartphone or Apple iPhone Vibrate but won’t ring

Mobile Phone Ringer Problem and Solution – How to Solve Ringer / Loud Speaker Not Working Fault in any Mobile Cell Phone

  1. Check ringer settings in mobile phone. Check Ringer Volume and Silent Mode. Adjust or change volume and / or mode if required.
  2. If the problem is not solved then disassemble the mobile phone and clean point and connector of the ringer / loud speaker.
  3. If the problem is not solved then check ringer using a multimeter. Keep the multimeter in buzzer mode. Value must be 8~10 Ohms. If the Value is not between 8~10 Ohms then change the Ringer.
  4. If the problem is not solved then check track of ringer section. Do jumper wherever required.
  5. If the problem is not solved then check Ringer IC. Give Heat using Hot Air Blower or change the IC if required.
  6. If the problem is not solved then heat, reball (BGA) or change UEM / Logic IC.
  7. If the problem is still not solved then heat, reball or change the CPU.

NOTES

  • If there is less sound from the Ringer then change the Ringer directly.
  • If the problem is not solved then heat or change the Ringer IC.
Top 5 ways on How to Turn off Roaming on Android

Top 5 ways on How to Turn off Roaming on Android

You need to keep in touch with your coworkers or family even if you’re out of town. What do you do if you don’t even have a mobile plan for that other location? Obviously, turn on roaming facilities on your phone if your phone service provider offers them. But, when you get back and you still can’t figure out how to turn off roaming on Android or turn off roaming on iPhone.  Then there’s an issue that needs to be troubleshot and fixed. Roaming can be really expensive and using it when it’s not required will 100% burn a hole in your pocket.

To tackle the issue of “why is my phone still stuck on roaming”, we have some quick solutions that’s hardly going to take a few minutes to activate.

Sync Mobile Data and Data Roaming

Before we dive into how to turn off roaming on Android. We need to address how data functions on roaming and what is data roaming Android? When you use data internationally, you’re under a roaming service for data. To use that facility, you need to make sure that your mobile data settings are in line with the roaming setting. Even if one of them is turned off, you may not be able to use data.

How to turn on roaming?

  • Settings
  • Connections
  • Mobile networks
  • Switch on the toggle for roaming

How to turn on mobile data? (Through settings)

  • Settings
  • Wireless & Networks option
  • Cellular data- switch it on.

If both are on, you can continue to use data on roaming freely.

Turn on and off.

Turning on and off data roaming to determine if there was only a tiny glitch with the settings is one of the simplest fixes we can provide for this problem. You’re good to go if it’s fixed. To do so, simply follow the instructions above, to work with roaming, then switch the toggle on and off.

Reboot

Another classic yet crucial step if you can’t figure how to turn off roaming on Android is restarting or rebooting your device. Here’s how you can restart it:

  • Press and hold the power button and click on the restart button if it flashes on the screen to directly restart.
  • Press and hold the power button until your phone completely turns off and repeat the same process to turn on. That would be a manual restart.
  • Then comes, press and hold the power button along with the volume/home buttons, simultaneously to force restart.

This should most probably fix the issue, if not, check out the next step.

Software update

But why is my phone roaming all of a sudden? Even after you’ve turned it off and you haven’t activated the roaming service in a really long time, how does it still get activated? When our phones are not up to date, they start acting up in ways we won’t even realize. This is why data roaming randomly turning on and off is an indication that your software needs a little nudge.

How to update your software?

  • Make sure your phone is charged or is connected to a power source
  • Tap on settings
  • About phone
  • Click on “Check for an update”
  • If there’s one, then update it.

It will reboot and install it automatically and your issue should be resolved in no time.

Factory Reset

In a lender of last resort circumstance, a factory reset is used. Always save this option for last, when you’ve exhausted all other possibilities. We have a strong backup in place because our phones automatically sync with Google. If you don’t want to use auto-sync, you may always use manual synchronizing. As a result, a factory reset isn’t necessarily a bad idea.

After you’ve taken up the right call, the following steps will enable you to factory reset your phone:

  • Pop open settings
  • Scroll down to system preferences
  • Click on advanced
  • Find the reset options
  • Hit “Reset all settings and Data”
  • Enter your phone passcode
  • And

You can then restore all your data through the backup you’ve taken while still having a clean new device internally.

Data Roaming Options for iOS

Now that we’ve covered everything that there was for Android, let’s shed some light on iPhones as well. Like, Android iPhone users also ponder about “Why is my phone roaming at home?”. You can replicate the same exact steps that have been mentioned above, to fix the issue on iPhones. Make sure you’re keeping the factory reset option as the last one, in this case too.

Hopefully, by the end of this, you all have been able to follow all the steps and have finally learned how to turn off roaming on Android and iOS.

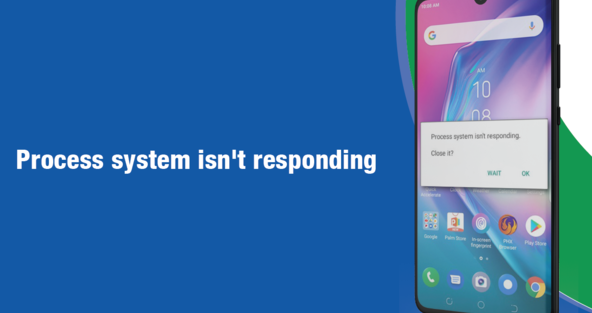
Process System Isn’t Responding? Effective Fixes To Revive Your Device

Process System Isn’t Responding? Effective Fixes To Revive Your Device

Muhammad Akmal

If you’re also facing the “process system isn’t responding” error on your Android device, it’s probably infuriating you right now. However, it’s a common problem on many older Android devices, and there are various ways to fix it.

Even though your Android phone is probably won’t say “process system isn’t responding” in 2021, you can’t tell the same for all Android devices, especially the entry-level devices with low memory and basic hardware. If by any means you woke up to the “process system isn’t responding” error on your Android device, the solutions in this article will help you out.

We’ve arranged this article in different parts, so you can navigate to what part concerns you, according to your Android device:

Table of Contents:

Why does my Android device say “process system isn’t responding”?

Part 1: 7 ways to fix “process system isn’t responding” on Android phones

  1. Force your phone to restart
  2. Free up your phone storage and RAM
  3. Enter Safe Mode to uninstall suspicious apps
  4. Update your apps from the Play Store
  5. Install System Updates
  6. Wipe the cache partition of your phone

Part 2: How to fix process system isn’t responding on Chromebook

Part 3: How to fix process system isn’t responding in Honda Odyssey

Part 4: How to fix process system isn’t responding on Oculus Quest

Why does my Android device say “process system isn’t responding”?

There are various reasons you may experience this problem on any of your Android devices. Despite that, many users reported the problem showed up after upgrading their Android software, installing apps from an unknown source, tampering with the system files (via rooting), and more.

Below are some reasons you might experience “process system isn’t responding” on your device.

  • Insufficient phone storage.
  • Software glitches & bugs.
  • Installing malicious apps outside the Play Store.
  • Altered or missing system files/apps.
  • Rooting and more.

Part 1: 7 ways to fix “process system isn’t responding” on Android phones

1. Force your phone to restart

First things first: we recommend you restart your device whenever the problem occurs. Doing so will wipe all ongoing system processes, refresh the memory, and probably fix the issue.

There are various ways to restart your device:

  • Press and hold the Power button for 10 seconds or more.
  • Alternatively, you can do it manually: long-press the Power Button, then select Restart (or Reboot) from the options.
  • And, if your phone’s battery is removable, you can remove it, then reinsert and reboot it instead.

2. Free up your phone storage and RAM

One of the more prominent reasons Android users face the “process system isn’t responding” issue is because of low storage. Your apps and the Android OS need some free storage space to store and maintain temporary files. If your phone storage is filled to the brim, your phone will misbehave.

If that’s the case, a simpler approach to solve the problem is to free up your phone’s internal memory. Just delete unnecessary files, large photos, videos, unused apps, and other redundant files on your phone. Or better still, you can move extensive files to an SD card if your device supports it.

But first, you need to check what’s eating into your storage before clearing things out. Follow these steps to do that.

  • Fire up the Settings app on your device.
  • Scroll down a bit and hit Storage!
  • Open Internal Storage to see your storage usage overview.
  • If the Available storage is less than 500MB, that’s a sign you need to do some cleaning in there. Of course, we recommend up to 1GB of free internal memory on your device, to ensure it’s always running at its best.

3. Enter Safe Mode to uninstall suspicions apps

Equally important, you should try uninstalling creepy apps on your phone if the “process system isn’t responding” keeps reappearing after cleaning up your storage. If an app you installed recently is conflicting with the system, you’re likely going to experience such a problem.

Nevertheless, you need to confirm if the problem was caused by an app or not. That’s where Safe Mode comes in. This mode lets you boot up your device without loading all third-party apps. Consequently, you may use Safe Mode to diagnose and fix various software issues, including the one currently disturbing your device.

Follow these steps to boot into Safe Mode:

  • Long-press the Power button.
  • Tap and hold Restart/Reboot in the power menu until you see a “Reboot to Safe Mode” pop-up message.
  • Finally, tap OK to reboot your device.

Note: the steps might be different on your device. However, you can always do a Google search for how to boot your device into Safe Mode. E.g., “How to boot TECNO CAMON CX into Safe Mode”

Immediately after your device enters Safe Mode, navigate the phone as usual for a few minutes. If the problem doesn’t occur, that means you’ve found the culprit. Now, you need to start uninstalling the creepy apps on your phone until the problem is solved. Start from the ones you installed recently.

4. Update your apps from the Play Store

If the problem persists after uninstalling suspicious apps on your phone, you should try updating your apps. In fact, many Android users claimed the problem was no more after updating their apps. So, you should do the same:

  • Launch the Play Store
  • Tap your Profile icon at the upper-right corner.
  • Hit My apps & games, then wait for a few moments to fetch available updates.
  • Tap Update all to update all you’re apps. Otherwise, you can update them manually from there.

5. Install System Updates

As well as updating your apps, it’s essential to keep your phone software up-to-date to fix process system isn’t responding error.

System Updates are not only for new features, they help keep your phone free from bugs, address critical issues, and protect you from hijackers. If you’re not sure you have the latest System Updates, follow these steps to check:

  • Launch the Settings app
  • Scroll to System and tap it.
  • Select System Update.
  • Tap Check for updates.

If an update is available, you’ll find it there. Simply download and install it as soon as possible. It may take a while before your device reboot while installing the updates. Just chill around.

However, if you still get the error after updating your device, try other solutions below.

6. Wipe the cache partition of your phone

Another method to fix “process system isn’t responding” on Android devices is to wipe the cache partition. This partition contains some temporary files created by the system to enhance performance. On the flip side, they can be problematic when corrupted or too much. Hence, clearing it may solve the problem you’re currently facing.

To do that, you need to boot into the Android Recovery Mode first:

  • Power off your device and wait for a few moments.
  • Next, press and of the combination of Power + Volume up button.
  • Release the Power button when the Android logo is shown.
  • Now, you’ll see a fallen Android Robot on the screen. Press the Power + Volume up buttons again to get into recovery mode proper.
  • Use the Volume down button to highlight “Wipe cache partition”, then select it with the Power button.
  • Confirm the action, and finally, reboot your device after that

Note: if you’re unable to boot into Recovery Mode, do a Google search for how to boot your device into recovery mode. For instance, “How to boot Infinix Hot 2 into recovery mode”.

Part 2: How to fix process system isn’t responding on Chromebook

If your Chromebook says “process system isn’t responding” trying most of the fixes mention in Part 1 should be able to fix it.

But first, restart your Chromebook. Press and hold the Power button for about 30 seconds to shut down the computer. After that, power it on normally

If that didn’t do the trick, try the methods below to fix the process system isn’t responding on Chromebook:

  • Free up your Chromebook storage and RAM
  • Update your apps
  • Install all pending system updates

Part 3: How to fix process system isn’t responding in Honda Odyssey

Many users of the Honda Odyssey vehicle also reported this same issue. If this happened to you as well, there are two things you can try restart the vehicle or report the problem to the manufacturer.

Follow these steps to fix the Honda Odyssey process system isn’t responding.

  • Power off the vehicle and leave it for 15-20 minutes.
  • After that, start the vehicle normally. The problem should be fixed by now.
  • If not, you can report the problem to Honda, and hopefully, they’ll help you fix it.

Part 4: How to fix process system isn’t responding on Oculus Quest

Like others, the Oculus Quest device isn’t left out in this problem. And if your Oculus Quest Device says “process system isn’t responding” or “Oculus app runtime isn’t responding”, there’s a way to fix it.

Many users who experienced this problem said it stopped showing after the device runs down. So, the solution is simple.

  • Turn on Oculus Quest and leave it for a few hours or days to let the battery run down.
  • Next, recharge the battery fully.
  • And finally, turn on your Oculus Quest device. Hopefully, it doesn’t show the problem anymore.

On the whole, your Android device saying process system isn’t responding can be frustrating. Nonetheless, following the guides in this article should see you through the problem. If non of the solutions worked for you, kindly seek help from an expert. And if you started experiencing this problem after rooting your device, the safest way out is to flash your phone with its custom ROM.

How To Find Hidden Apps On Android Devices

How To Find Hidden Apps On Android Devices

We all know many Android users want a clean app list on their device apps drawer and homepages. You might also hope the apps you frequently use can be well sorted out first on your homepages and app drawer list. This is possibly done by hiding these few unused apps either when using your Android launcher. Let us guide you through how to find hidden apps on Android.

HOW DO I FIND HIDDEN APPS ON MY ANDROID PHONE?

You may find it hard, or have no clue on how to find hidden apps on your Android device even as an existing user. Fortunately, we can guide you through where and how to find these apps with these simple steps.

Apps Drawer

As stated earlier, your app drawer houses the various apps downloaded and installed on your Android devices with the system apps designed to perform specific actions on the device. Most Android devices’ hidden apps can be searched and found on the App drawer page. However, the app drawer page varies on different Android launchers.

Though various launchers have customized app pages with different icons and steps for hidden apps searches, the steps below will be centered for Android launchers such as Smart Launcher, and Nova Launcher.

Nova Launcher

This launcher is a third-party developed app that lets you customize and overhaul your home screen with amazing features and themes. As a user, you can locate your apps hidden from your home screen on Nova Launcher with these few steps:

  • Long press your screen on the Homepage
  • Click on Settings
  • Locate and tap on the App Drawer
  • Select Hide Apps
  • Remove Hidden Apps

Smart Launcher

Smart Launcher is another efficient third-party-developed launcher that provides Android users with a customized experience different from your default launcher. Your hidden apps can be located easily on the launcher by:

  • Swipe and Open the Smart Launcher app drawer page
  • Click on the three dots located at the top corner of the page
  • Select Show Hidden apps

For most Android devices, your hidden apps cannot be found on your App Drawer. The other ways to find them are explained further in this thread

General Settings

The general settings of your device are where you can check and alter your overall device settings. Your full app list downloaded and installed alongside your system apps can be found here in the Settings app. You can easily access your enabled and disabled apps with the few steps below

  • Open your App Drawer
  • Click on Settings
  • Locate and Tap on Apps & notifications.
  • Tap See all apps.
  • From there, you’ll find all the apps installed on your phone.

Homepages

Your homepage can have other pages aside from the main page where your app drawer is located when you have a full homepage with various apps. The other page is created and hides other apps from your glance. Newly installed and received apps are mostly situated on the other page and remain unseen unless the page is revised. These hidden apps can simply be found by swiping left or right on your homepage.

Folders

Another way on how to find hidden apps on Android is to unbox your folders. Google developed apps like Google Photos, Google Drive, and Google Mails are hidden in folders created automatically for Google apps, although these apps might be noticeably present on the App Drawer page. But, you may not easily find them alphabetically arranged on the App Drawer page.

These apps can be found handily in the folder.

Third-Party common hidden Apps

Third-party apps are developed by independent developers for Android devices to perform specific functions. An intruder can install a third-party app on your device and hide your apps to hinder you from using them. Sadly, you may find it hard to find them because most of these apps covers are mostly different from their features.

Below is a list of common hidden apps that are perhaps used to hide apps on  Android phones. You might find them useful as well.

  • Calculator Vault: This app is designed as a calculator but helps to hide apps with a password.
  • App Hider: App Hider is another common app that hides apps by importing the app to its app.
  • Hide App: Hide App is a third party application that hides apps from a user with a secured pin lock
  • Phone Master: Phone Master is quite different from other apps as it is a system app designed to monitor data usage, file transfer, smart charge, and freezing unused apps. You can also check the freezer to check if you have no hidden app there.

HOW TO UNHIDE APPS

To enable a lasting solution after finding your apps on your Android, you can apply these methods to avert a reoccurrence.

  1. Uninstall Third-Party Apps
  2. Always Enable Disabled Apps
  3. Unfreeze Apps

This article should ultimately guide you on how to find your hidden apps and how to get rid of spy apps on your device. It’s assured to work at an optimum rate.

How To Repair Dead Android Phone

How To Repair Dead Android Phone

By Muhammad Akmal

HOW TO REPAIR A DEAD ANDROID PHONE: TRY THESE FIXES IF YOUR PHONE WON’T TURN ON

From fixing a dead phone that won’t turn or charge to flashing a new ROM, here’s your all-in-one guide on how to repair a dead Android phone.

An Android phone that won’t turn on or charge can be the most infuriating experience you’ll ever experience using a smartphone. While you can easily trace a faulty part of your phone to a certain component, it’s clearly uncertain to point out why you have a dead Android phone in the first place. This article will guide you through various tips and tricks on how to repair a dead Android phone.

There can be various reasons why your Android phone died and won’t turn on. However, it can be grouped into two categories: hardware damage, and software malfunctions. Inconsiderate of why your Android phone is dead, the fixes below will help you revive it. For most software issues, you can fix them on your own. But hardware problems may require technical assistance from a certified repairer.How To Repair Dead Android Phone That Won’t Turn on

Part 1: How to fix a dead phone that won’t turn on.

My phone died and won’t turn on or charge: try the fixes below to troubleshoot your dead Android phone.

1)    Fix the charging problem

If your phone died and won’t turn on or charge, the first thing to do is to troubleshoot the charging problem: your charger, USB cable, the charging port, and the power outlet.

At a non-technical level, you need to ensure your charger is delivering power to the phone. If not, your dead phone won’t turn on or charge. If you have any other working Android phone around you, try charging it with the original charger you’re using to charge your dead phone. If it doesn’t charge it, then the charger is faulty: you need to troubleshoot it first. Make sure you’re using the original charger that came with your phone or its equivalent, then try the fixes below to fix your charger

  • First, ensure the USB cable is firmly connected to the charging brick (charger), and to your phone.
  • Look into your phone’s charging port and ensure there’s no lint or dust inside it. If the port is dirty, try cleaning it first.
  • If it’s still not charging, try plugging the charger into another (working) wall outlet. If you’re not sure the power outlet (wall socket) is working, try plugging in another appliance, such as a lamp or tester, into it.

The steps above should fix your phone’s charging problem. If not, you can try using another original charger and USB cable marked with your phone. You can also try charging from the USB port on your computer.

2)    Keep charging the dead phone

After clarifying that your charger is working, the next solution on how to repair a dead Android phone is to charge your phone for a while. One of the common reasons why many users’ phones died and won’t turn on or charge is because the battery is drained to zero.

In that case, we recommend you plug in your phone with the working charger and let it charge for 30 minutes or up to 2 hours before try another solution. Doing so ensures your phone has enough battery juice to power it on.

If your phone has a charging indicator, make sure it’s working when your plug in the charger. And if you’re lucky, the screen may turn on when the battery is charging. Meanwhile, leave it to charge for at least 30 minutes or up to 2 hours before turning it on.

3)    Try to force restart your dead phone

If your dead android phone still won’t turn on or charge after plugging it to a working charger for 30 minutes, you should force it to restart. Doing so will close all the active sessions on your phone and restart it. Try any of these methods to force your dead Android phone to restart.

  • Press and hold the Power button for 8 – 10 seconds. OR,
  • Press the Power + Volume down (or up) button for 8 – 10 seconds.

4)     Is your screen Faulty?

Simply do a quick check-up before we move to some advanced troubleshooting to fix a dead phone that won’t turn on. If your phone normally vibrates or makes sounds when it’s powered on, you can use it to diagnose whether your screen is malfunctioning.

  • Long-press the Power button for 10 – 30 seconds (trying to force your phone to restart)
  • Wait for a few seconds to hear if your phone vibrates or make the boot-up sound.
  • Otherwise, wait for like 5 minutes, then ask someone to call you. If your phone rings, your screen is probably the problem.

If you find out your screen is at fault, you may need to visit a repair center to fix it first. More so, if none of the fixes above worked, you may need to visit the service center for battery replacement or further checkup. OR, try the advanced troubleshooting methods below on how to repair a dead Android phone.

Part 2: Check your dead phone with Multimeter

If you have a multimeter at home, you can use it to diagnose and know how to repair a dead Android phone. Meanwhile, this will require you to open the phone and check various components on the motherboard with a multimeter. So, if you’re not a professional repairer, its better you stay off that area. Just visit a repair center straight.

If you’re a professional mobile repairer, then you should know how to check dead mobile with a multimeter. The thing is, the reason why your phone is dead might not be totally power issues, but a minor hardware problem. But by checking the phone hardware with a multimeter, you can know where to fix the problem.

Part 3: Flash your dead Android phone

Why many people think about how to fix a dead Android phone only by troubleshooting the hardware, it’s not the only thing to do. As far as it’s concerned, your dead Android phone could be as a result of corrupted firmware or flashing of incompatible custom firmware. If that’s the problem, what you need to do is to re-flash your phone with the stock firmware.

Now, that could be an arduous task or risky task based on your past experience with flashing phones. Risky in the sense that: flashing your dead Android phone with the wrong firmware can brick your phone. Meaning it’ll render your phone useless forever.

Meanwhile, if you’re scared, it’s best to visit a professional technician to help you look into it. If you can do it yourself, all you need is a PC, original USB cable, the ROM (firmware) you want to flash, and the flash tool compatible with your phone.

How to flash a dead Android phone

Depending on who made your phone, ways of flashing Android phones differ. For example, how to fix dead boot MediaTek phones is different from flashing a dead Samsung phone. So, the best thing to do is search for how to flash your phone mode on Google. Here’s how:

  • Search for how to flash your phone on Google using this format: how to flash “brand name” + “phone model”.

For example, you can search for “how to flash TECNO CAMON 15”

  • Click on any of the results from a trusted website.
  • Download the required flash files (ROM, flash tool, and driver) on your computer.
  • Follow the flash guide strictly.

Part 4: Visit the official service center

Relax, you’ve tried enough. But unfortunately, if flashing a new ROM and trying all the fixes above cannot power on your dead Android phone, the last resort is to visit the official service provider for your brand.

Most times, the official service provider may help you repair your dead Android phone for free if the problem wasn’t caused artificially or through mishandling.

If you use a TECNO, Infinix, or itel smartphone, Carlcare is your best bet to repair a dead Android phone. They’re the official service provider for these brands, and they have professional engineers who can help you diagnose and repair your dead Android device. Visit any of their service centers near you for high-quality mobile repair service.

Why your phone isn’t charging and how to fix it

Have you ever come home after a long day to plug in your phone, only to find that it won’t charge? It’s a more common phone issue than you might think. The good news is that, in many cases, there’s a simple reason why this is happening and an easy solution to fix it.

Maybe your phone fails to start charging when you plug it into the wall, or it says it’s charging without adding to the battery bar. Whatever is happening when you try to charge your device, we’ll offer a few tips below that can help you find the right solution.

Why Does My Phone Not Charge?

If you’re wondering why your phone says it’s charging but it’s not responding to the cord and adapter, there are a few possibilities to explore. You may be able to address the issue on your own without having to replace the whole device.

For example, your charging issue could be as simple as a software glitch in your phone’s system. Perhaps dust, moisture or debris have started to build up in your charging port. In some cases, it may even be the fault of the charger or adapter rather than the phone itself.

There are several potential culprits that could be hindering your phone’s ability to charge. Once you know what they are, it’s often easy to troubleshoot and fix them.

How to Fix a Phone That’s Not Charging

If something is preventing your cell phone from charging and you suspect any of the above issues, consider using some of these quick fixes. You can try:

  • Turning it off and back on: The most obvious step is often one of the most effective. Before trying anything else, reboot your phone and see if that helps. If it’s a bug or glitch in the system, a reboot can return your device’s performance to normal.
  • Updating your device: You can also fix small software bugs by making sure your device is up-to-date. Updates are often designed to patch glitches that can cause performance issues.
  • Using a different charging cable: Charging cords wear out over time, and sometimes they can stop working altogether. Consider buying a different charger or using a spare to find out if that’s the root cause you’re looking for.
  • Cleaning out the charging port: If you suspect that your phone’s charging port has become clogged with dust or other particles, power down the device and look inside. Gently blowing on the port can loosen any particles that are in the way.
  • Making sure your phone is dry: Water or moisture can cause all types of performance issues with your phone. If moisture is the culprit, you may be able to dry the device by placing it in a bowl of rice overnight.

What Are Your Other Options?

What if you try all these tricks and your phone continues to resist a charge? It could be an issue with the device’s battery or hardware. Depending on the device, you may be able to buy a brand-new battery to maximize the life of your phone. If it’s another hardware issue, you may need to take it in for repairs or replacements.

Once you know what’s causing your phone’s charging issue, it’s up to you to decide how to handle it.

Common Mobile Phone Problems and How to Fix Them

Common Mobile Phone Problems and How to Fix Them
By Abraham Miller

Even now that smartphone technology seems to be near the climax, it’s not always perfect. And at some times, we wish not to face the common mobile phone problems like poor battery life, low storage space, low stamina, and others again. But thank goodness, you can fix common mobile phone problems in minutes, even consulting no one. And in this guide, we’ll run through various familiar smartphone issues, and we’ll recommend the quickest ways to fix them.

Ready? Get on the bus and let’s take you on a journey!

common mobile phone problems and how to fix

10 common mobile phone problems and how to fix them!
We’ve picked these 10 problems out of the lot since they’re the ones you likely may face while in entanglement with your tiny pocket machine.

  • Storage space running out
  • Poor battery life
  • A phone running sluggishly
  • Overheating
  • Connection problems
  • App or phone crashing
  • Blurry camera
  • An unresponsive phone
  • A phone that won’t turn on or charge
  • Hardware defects
  • Now, shall we delve into them and their possible fixes?

1. Storage space running out
One of the common mobile phone problems people still face to date is low storage space. It doesn’t matter if you’ve got a phone with 128GB of storage or more; your phone would certainly run out of capacity after storing a whole lot of things on it.

Well, the solution is that you almost don’t have to store anything on your phone, talk less of filling up the storage, in today’s era. Even if all you have is 32GB of storage or less, you can live happily without worrying about the messy “Storage space running out” notifications.

First, we’d recommend you scan your device with the Files by Google app from the Play Store. The app tells you everything taking up your phone storage and help you get rid of them comfortably.

Additionally, you should delete every app, video, and other files you don’t need on your device.

Continue by backing up your photos (and videos) to the cloud with Google Photos. Doing so allows you to delete the heavy local files to reduce storage usage. Not just that, your photos (and videos) remains in the cloud forever and syncs across all your devices that have your Google account signed into.

Finally, you may consider transferring your stuff to the SD card to reduce the stress on your phone storage. Of course, many phones in 2021 still offers expandable storage.

2. Poor battery life
We can’t but emphasize how beautiful it is to go all day without feeling frustrated to see the low battery warning.

And while your battery spec has more to say about having great battery life, it all boils down to how you use your phone – specifically the screen and other activities that may follow.

Start by lowering the screen’s brightness. You should see the brightness slider in the Quick Settings by swiping down twice from the top of your phone screen. The brighter your phone screen is, the faster it burns your battery.

And if you don’t want to keep adjusting the brightness in every lighting condition, you can enable Adaptive Brightness. That adjust your screen brightness automatically based on the lighting condition of your current environment. You can find the Adaptive Brightness (A) beside the brightness slider or via Setting > Display > Adaptive Brightness. Right there, also reduce your screen timeout to ensure your display is not using an extra battery when you’re not using it.

Additionally, if your phone has an AMOLED display – like the TECNO PHANTOM X – and it runs on Android 10 and above, turning on Dark Theme is another reliable way to reduce how much battery your screen uses.

And finally, if your battery is still dying fast, be sure to check these extra 15 tips to make your phone battery last longer. Or better still, you may check whether your phone’s battery is due for replacement.

3. A phone running sluggishly
For most of us, a slow-running phone is somewhat equivalent to having a bad day. But that shouldn’t be the case since you’re here.

And in most cases, fixing a slow-running phone is practising most of the tips we’ve said earlier and the later ones in this article. These include freeing up your phone storage, deleting apps you don’t need, reducing background tasks and apps, etc.

That’s not all; all the tips covered in our “how to fix a phone running slow” guide should help you out. But there’s one more thing: adjusting your phone’s animation duration can speed up your phone heavily.

You can’t find where to reduce your phone’s animation duration straight in the device settings app – you’ll need to delve into the developer options to see the little trick. Here’s how.

First, enable Developer option:

Open the Settings
Navigate to My Phone (or System → About Phone, depending on your OEM’s choice)
From there, find the tab labelled Build number and tap it 7 times.
You’ll receive a prompt to confirm your screen lock. Confirm it and wait to test your new trick.
Now, it’s time to reduce the animation speed:

Go back to the main Settings and select
Tap the Developers option from there.
Keep scrolling down till you get to the “Drawing”
Under it, you should see “Window animation scale,” Animator duration scale,” and “Transition animation.”
Tap them one after the other and change their parameters to “Animation 0.5x”
Your device should feel snappier now. You may also set the animation scale to “Animation off,” but that’d remove animations for your phone entirely.
Meanwhile, do not tinker with the developer settings if you don’t know what you’re doing. Playing with the wrong options may affect your user experience.

4. Overheating
While it’s acceptable for your smartphone to get warm while using it, that doesn’t mean it should feel like it has been in the oven for a while. Do you get it?

If your phone overheats while charging, try not to use it during that time. And, ensure you keep it under room temperature while charging.

Next, you want to ensure you don’t run apps that need high CPU and GPU for long hours. If you’re a game addict, ensure to take breaks between games sessions to allow your phone to cool off. Similarly, make sure you don’t have many heavy tasks running in the background.

After all, the takeaway is to allow your phone to rest once it’s getting hot. Using a hot phone continuously may cause more harm than good. And if the issue persists, however, you may need to see a technician.

5. Connection problems
Unlike most of these common mobile phone problems, the pain of having connection issues is nothing to write home about. But’s it’s what you can fix in under 2 minutes.

Whether you’re having a problem connecting to your mobile data, a Wi-Fi network, or a Bluetooth gadget, turning on Airplane mode for a least one minute is a reliable solution. Here’s how.

Locate the Airplane toggle in your Quick Settings panel.
Turn it on for at least 1 minute
Turn it off again, then try reconnecting to the network.
If that didn’t do the trick, we recommend you to restart your device or contact your network provider.

And of course, you can get more tips in our guide on “how to fix internet connection problem on your device”

6. App or phone crashing
App and phone crashing seem like that problem you can’t but come across on mobile phones, even if you’re using the most expensive phone out there. The reason is developers make changes, and sometimes it breaks things.

Even so, your phone caches some app data on your phone to use later. However, they cause apps to crash when corrupted. In that case, you need to clear the cache data for the specific app. Here’s how:

Locate the problematic app from your app drawer. Example:
Long press on its icon, then select “App info” (on some devices, they may represent the button with
From there, tap Storage & cache
Hit Clear cache.
Go back in one step and tap the Force Stop button to close the app. Then, try using the app to see if it misbehaves again. If yes, then you may need to tap the Clear data button as well.
Additionally, updating your apps and phone software, freeing up your phone storage, deleting unused apps, and all the tips mentioned in our “How to fix app crashing on Android” guide will help you get rid of the issue.

7. Blurry camera
It’s undeniable that smartphones have replaced Digital Cameras for many people. But it’s quite frustrating to see your phone taking mediocre pictures unexpected.

When such a thing happens, your phone’s camera lens (glass) might be dirty. All you need is to grab a piece of a soft cloth and wipe the camera glass.

If cleaning the lens is not the problem, however, it’s time to visit the technician.

8. A frozen/unresponsive phone
Imagine having your phone freeze up in the middle of an important task… I’ve been there, and it’s just one of the most frustrating common mobile phone problems out there.

And when your phone becomes unresponsive, there’s nothing you can do other than restarting it. But how do you restart your phone when the screen is completely frozen? We have a trick.

For most Android devices, long-pressing the power button for about 10 seconds or more will trigger it to restart. And when your device restarts, it fixes the hanging issue.

After your phone’s sense is restored via the hard restart, you should learn how to fix a frozen phone by yourself, so you won’t face the problem next time.

9. A phone that won’t turn on or charge
Another worst-case scenario of a smartphone issue is a phone that won’t turn on or charge. No matter how hard you try, the phone remains in its dumb state, feeling useless like a piece of brick.

When you face such a problem, though, you don’t have to panic. There are two things you need to troubleshoot – the charger/charging port and the phone itself.

Start by learning how to clean the charging port. Basically, you need to get a toothpick to remove the debris inside the charging port. Your phone may not charge when the charging port is faulty. But cleaning it gently could fix the problem.

After that, you’ll want to confirm your charger is working, then leave your phone to charge for a while. If the battery ran all the way to zero earlier, it might take a time to recharge. So, let it charge while you do other things.

If that didn’t fix the issue, check our complete guide on how to fix a dead Android phone that won’t charge or turn on.

10. Hardware defects
The last common smartphone problems we’ll mention here are hardware defects. These range from faults like poor battery life, broken screen, hardware sound problems, broken camera lenses, and many more.

As you presumably know, these are not the issues you can fix on your own. With that, you need to find the official repair centre for your brand to resolve the issues.


How to Download MP3s From YouTube

How to Download MP3s From YouTube

Many applications on the web make it very easy to convert a YouTube file to an MP3.
Sometimes it seems like you can find just about anything you want on the internet. Other times it feels like that one song you can’t live without is missing from the major music subscription services. And then sometimes there’s that situation in between, where the only place you can find the song is in a YouTube video. There are a couple of challenges to overcome, the first of which is how to download the video in the first place. Where do you begin?
Before we even get started, it’s important to note that this isn’t just a technical challenge. YouTube’s Terms of Service explicitly say that you can’t download and modify (among other things) content from the service without express consent from YouTube, and possibly the rights holder of that content. If you aren’t sure, the safest thing to do legally is to leave it alone.
The task here is to convert a video file into an audio file. If you were to download a video directly from YouTube, it still wouldn’t be in the MP3 format. You might be able to listen to the file with a video app on your smartphone, but if you’re creating an audio playlist, for example, your top workout songs, you can’t simply drop the downloaded video into an audio app playlist.
Although some YouTube converters are applications you can download and use on a computer or smartphone, others do their magic on a website. Be careful to choose an app that doesn’t include any malware or viruses. Do a little research on reputable websites before downloading that converter app, even if you’re in a hurry.
Some converter applications can do much more than simply download videos from YouTube. Any Video Converter, available for Windows and Mac computers, can download and convert the tracks to make MP3s, but the free version of the software also lets you edit and save video files, and burn DVDs, too. Paid versions of the software add more features, including screen recording and the ability to convert your DVDs to video files on your computer. But don’t forget, copyright laws and software terms of service apply here, too. If you aren’t the rights holder or don’t have express permission, it’s probably not OK to make copies this way.
4K Video Downloader is another application for Windows, Mac and Ubuntu Linux. The free version lets you download up to 30 videos per day, playlists of 10 videos and five videos per channel. Paid versions remove these limits and add more features. The same company offers 4K YouTube to MP3, which offers a similar feature set.
YouTube to MP3 Converter is a well-known website you can use to convert YouTube videos to MP3. Mp3skull is another. Whether it’s website- or computer-based, these tools are all simple to use. To convert a single YouTube video to MP3 using the two converters we just mentioned:
1. Copy the URL for the YouTube video you wish to convert, and begin the next phase of the conversion process.
2. Choose the save location and file format options, which will depend on the software you’re using. This may include format and bit rate, among others.
3. Once you’ve told the computer what it needs to know and tell it to continue, it will process your request and convert the file for you. You can now finish your workout playlist!